Quick Start
Prepare Your Hardware
In this guide, we use the Seeed Xiao ESP32-C3 module as an example. Please prepare your hardware according to the wiring diagram shown.
Since core boards like the Seeed Xiao ESP32-C3 lack support for peripheral hardware such as temperature sensing and current sensing, you can only use dimming and manual fan control functions with it. If you want to experience the full feature set, consider Borneo-IoT’s companion hardware products, such as the Buce Dimmer Core Board.

Constant Voltage Wiring Diagram
MOSFET Selection Guidelines
Choose a MOSFET with a gate threshold voltage lower than 3V.
Select appropriate MOSFET parameters based on your power supply voltage and the expected LED current. For example, if you are driving several 1W (350 mA) LEDs, you may consider the AO3400C.
Choose MOSFETs with the smallest possible junction capacitance to reduce switching losses and improve efficiency.
Flash the Firmware
To make testing easier, we developed a browser-based firmware installation tool. Simply connect your ESP32 to your computer using a USB cable. The browser will prompt you to select your ESP module. After confirming, click the “CONNECT” button and follow the on-screen instructions to flash the firmware.
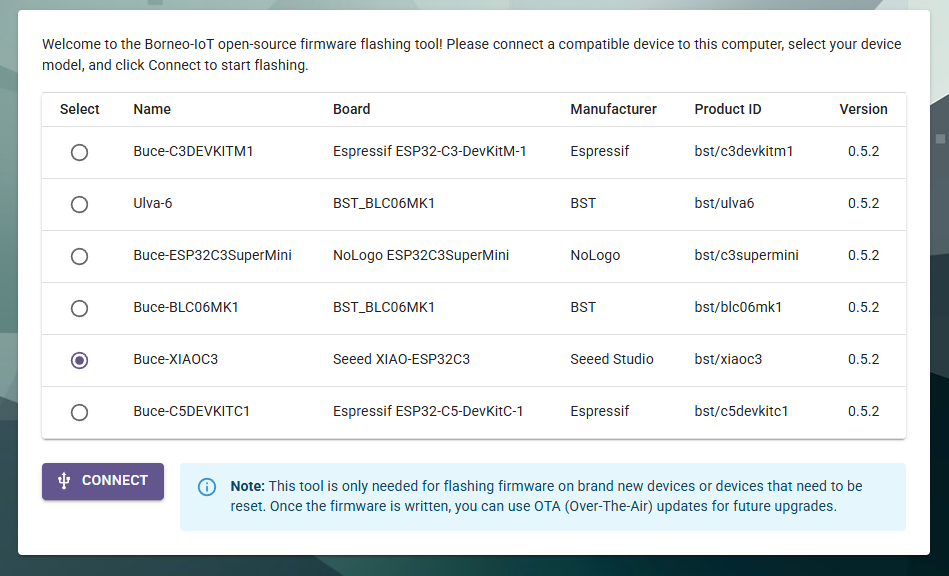
Browser Based Firmware Installer
Warning
For your computer’s safety, flash the firmware and configure the PWM frequency parameters via the mobile app before connecting the ESP module to the circuit.
Except for short-term testing, always connect an appropriate fuse for long-term operation to ensure safety.
The AC power section must be properly grounded!
Install the Mobile App
Our app is currently under review in app stores. For Windows and Android users, you can download the precompiled Windows executable and Android APK directly from the GitHub Release page. Apple users currently need to build and install the app from source.
To build and install the app from source, please refer here.
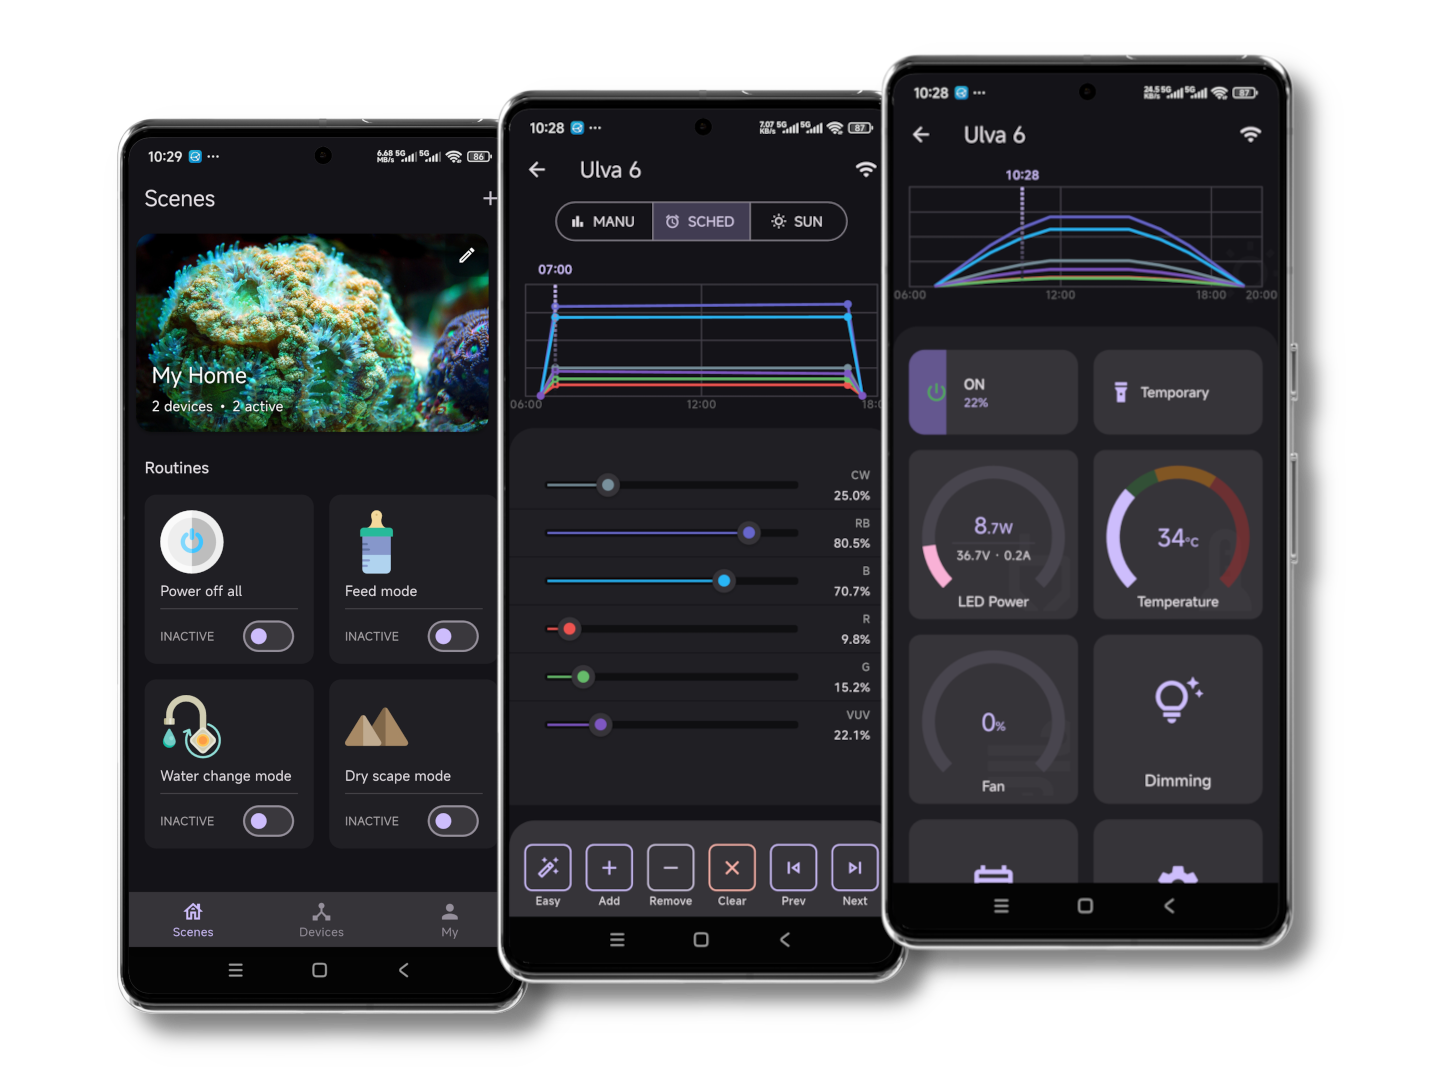
The Borneo Aqua Pro App
After installing the app, switch to the “Devices” page and make sure Bluetooth is enabled on your phone. Tap the “+” icon in the upper-right corner to scan and add a device. Select your WiFi network and enter the password to start using the device.
Note
Currently, most ESP boards except the ESP32-C5 only support 2.4G WiFi.
After the device connects successfully, open the device “Settings” page and enter “Controller Settings” to configure each channel’s name and color according to your LED hardware connections.
Most importantly, set the PWM frequency correctly. If you are using a constant-current driver, refer to the driver’s datasheet. Many drivers cannot support dimming frequencies above 4 kHz, such as products from Meanwell.
Enjoy Your Smart Aquarium Light
Once you complete the circuit connections, you can enjoy the fully automated smart aquarium lighting experience!
Have fun!